APRSIS32 is an incredible APRS client. It has more features, I jokingly say, then the developer KJ4ERJ/SK even knows about. Just looking at the website you’re going to find a thousand pages of information, and that is not even fully complete. There is a lot to this piece of software and it can easily become very overwhelming. Hopefully I can clear a few things up with this post. Some of the capabilities of APRSIS32 are locked within the XML file and I will avoid getting into that here. If digipeating is what you want to do, then read up more on the APRSIS32 website and the information is there.
I’m going to jump ahead and assume that APRSIS32 has already been downloaded and installed on your computer. I am going to cover how to properly connect APRSIS32 to VaraHF for receiving and sending APRS packets over the air.
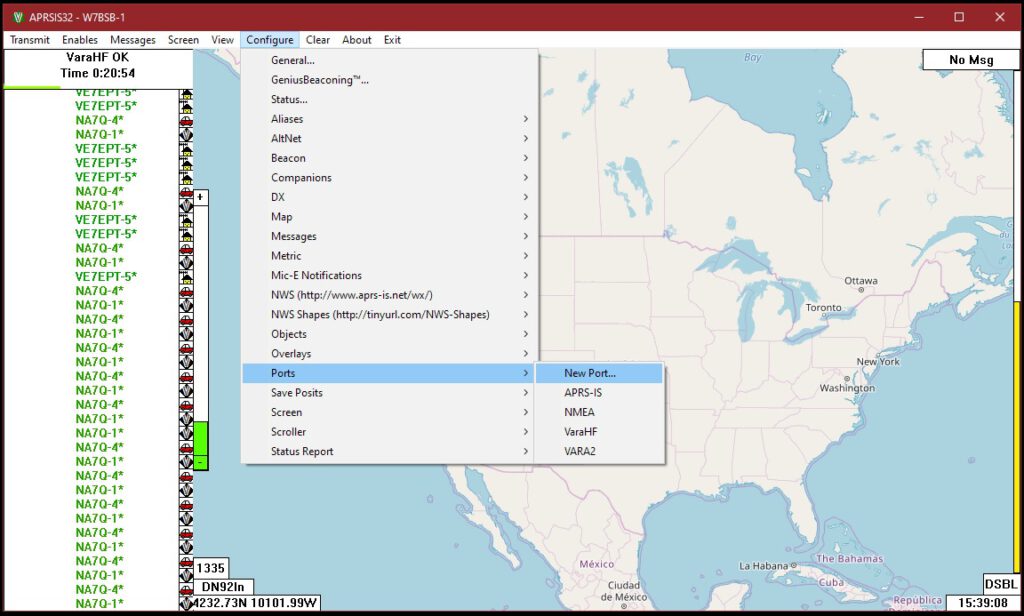
Configure > Ports > New Port…
To get VaraHF and APRSIS32 to start talking, you need to tell them how. At the top of the APRSIS32 window, click on “Configure,” go down to “Ports,” and select “New Port…”
In the next window, for “Type:” choose “Simply(KISS)” from the dropdown menu. Under that, create a name for your VaraHF connection.
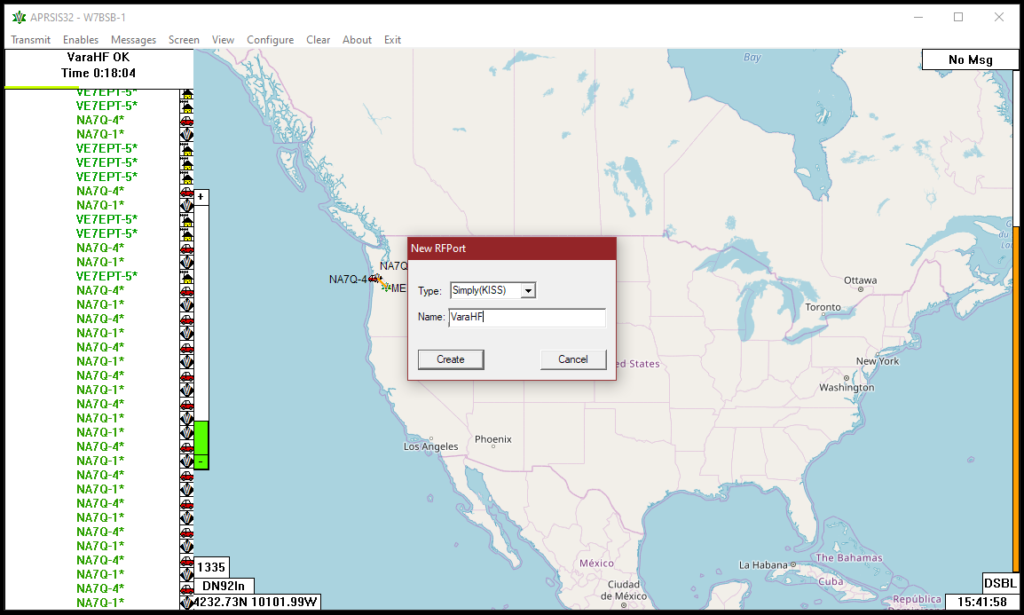
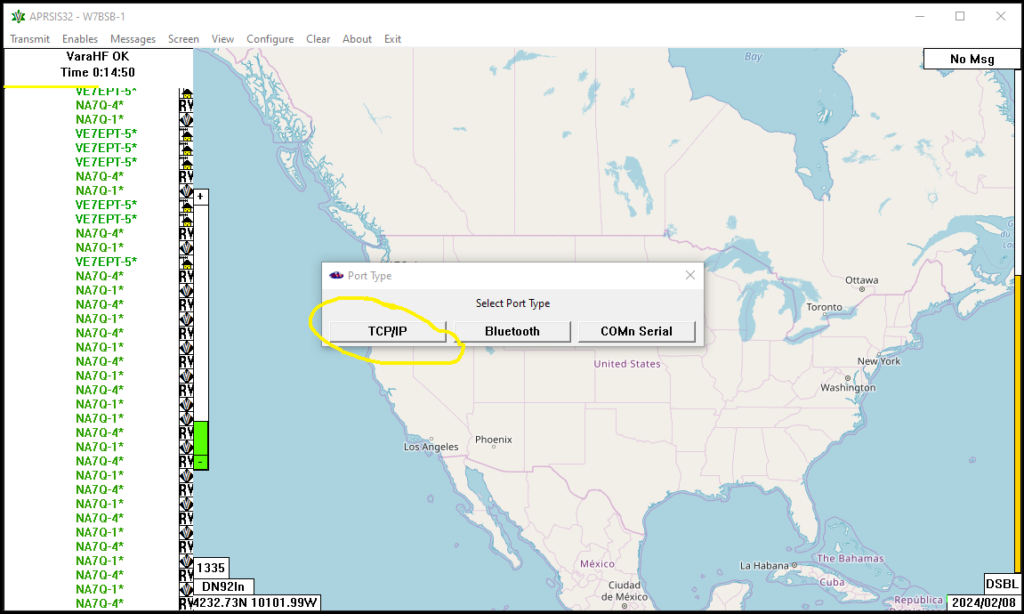
Hit that create button and it will ask you what type of port your would like to create. For Vara, make sure you choose TCP/IP.
Once you select the TCP/IP button, you will be given two windows. The top window will be “TCP Configuration.” Here you will want to reference your VaraHF settings and matchup both the IP address from the top of the window (usually 127.0.0.1) and the Port number (usually 8100.) With both of those items entered correctly, click on OK.
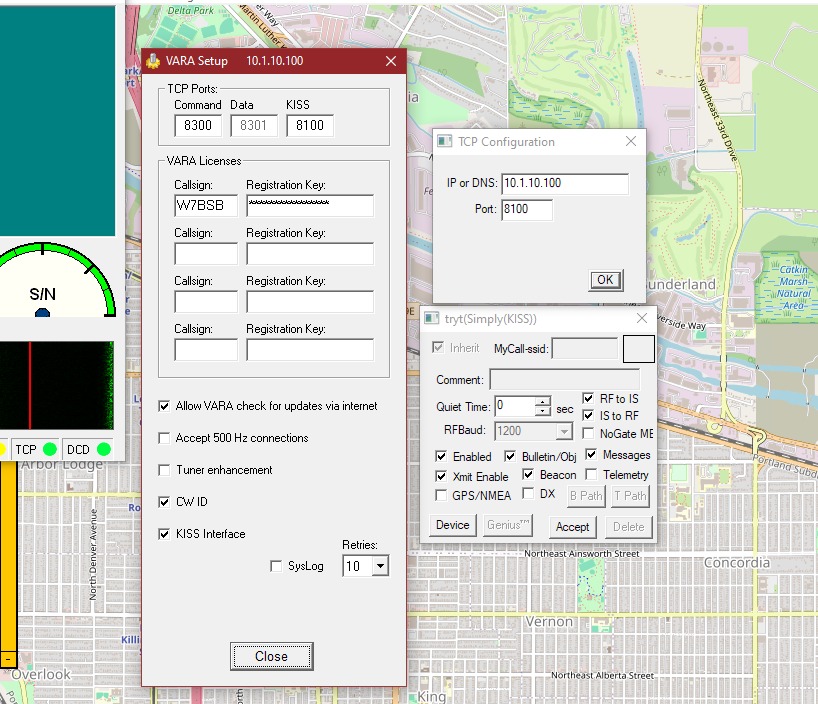
The following window gives you a variety of options that you can do with that new VaraHF port. The fields for “MyCall-ssid” and “Comment” should be inherited by the APRSIS32 general configuration from when it was installed. Here are what you will encounter

RF to IS: selecting this will send packets that you receive over-the-air to the internet (APRS-IS and APRS.fi). This requires a password (see Links)
IS to RF: selecting this will allow you to transmit over-the-air information from the internet to Tx. Selecting both of these turns your station into a two-way iGate.
No Gate ME: I prefer to see myself online via APRS.fi as others do. This will make sure that you are gated only by stations that hear you, not your own internet connection
Enabled: APRSIS32 will process packets from VaraHF (must be selected)
Bulletin/Obj: APRSIS32 will process bulletins and objects via VaraHF
Messages: APRSIS32 will process messages via VaraHF (should be selected)
Xmit Enable*: allows APRSIS32 to send via VaraHF (must be selected to send)
Beacon: allows APRSIS32 to send your beacon over VaraHF (should be selected)
Telemetry: allows APRSIS32 to send Telemetry data over the air on VaraHF
GPS/NMEA: allows APRSIS32 to send direct GPS device info over VaraHF
DX: allows APRSIS to send programed DX alerts over VaraHF
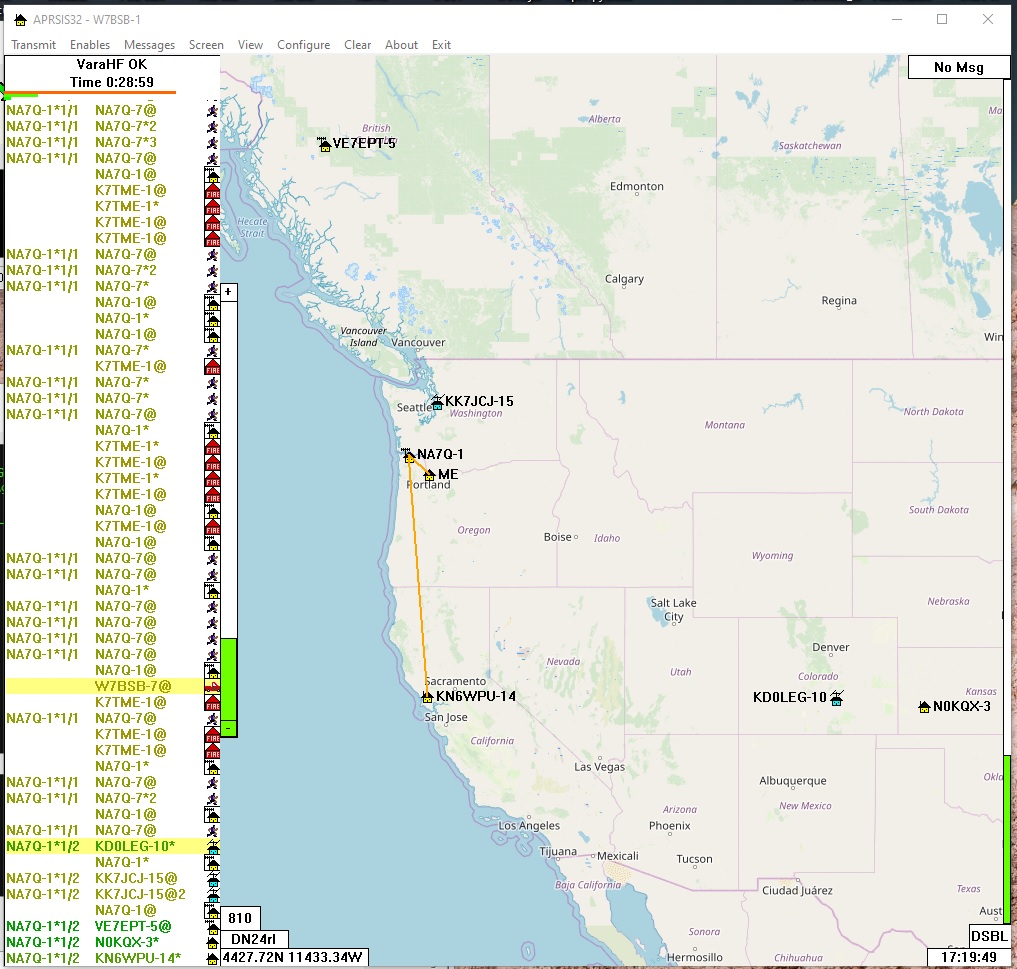
Once your accept the configuration on the VaraHF Port window, APRSIS should connect to VaraHF. If VaraHF is running and the connection is made, you will see “VaraHF OK” (or whatever you named your port-OK) in the upper left corner of the APRSIS32 window, underneath the “Enables” menu. If it does not, Click on the “Enables” menu, go down to “Ports” and click on your port to make sure it is checked. If it says “VaraHF Delayed” then you need to make sure to open VaraHF, and then double check your port configuration.

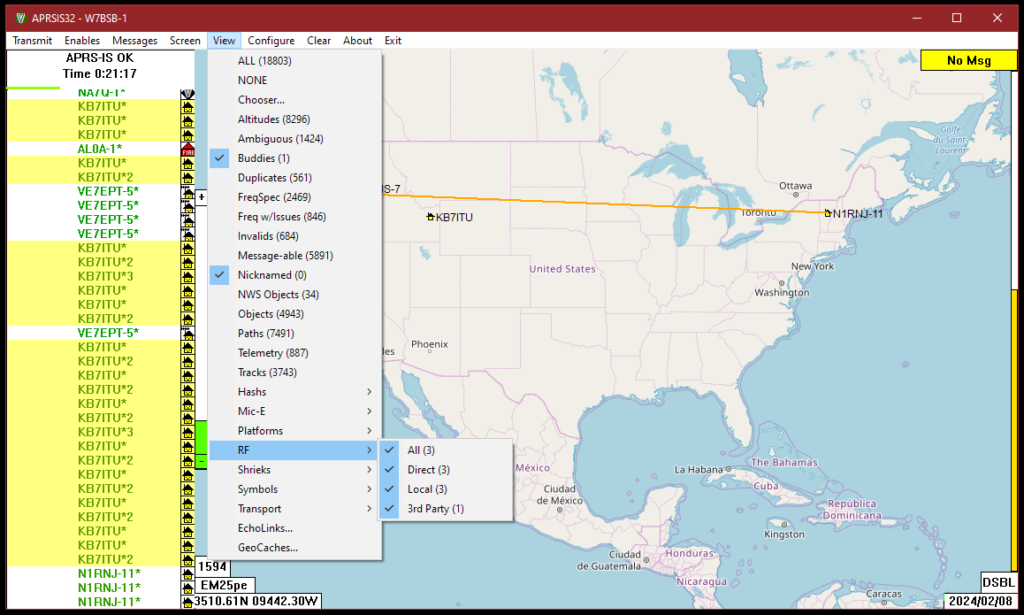
At this point, with your Vara Port functioning, you are able to send and receive beacons and messages. But, you probably have a MESS on your map full of stations that are coming over from APRS-IS internet. Go up and click on “View” and click on “None.” This will get rid of anything that you haven’t heard directly. Likewise, go back up to “View” and go down and click everything in the “RF” section. Now you’ll only see what your radio hears.
I’ll be back with another post on how to set up APRS-IS, iGating and Digipeating with APRSIS32 soon.
1 Dec 24: Sadly KJ4ERJ is now a silent key.
73!
Leave a Reply